
Best Hobby Tools for 3D Print Cleanup
Table of Contents
- Essential Hobby Tools for 3D Print Cleanup
- Tools to Remove Supports from 3D Prints
- Best Deburring Tool for 3D Prints
- Sandpaper for 3D Prints: Grit Selection and Technique
- 3D Printed Miniature Cleanup: Precision Finishing
- Safety Gear and Surface Preparation for Post-Processing
- Tool Maintenance and Longevity
- Frequently Asked Questions
Last Updated: October 9, 2026
Essential Hobby Tools for 3D Print Cleanup
Post-processing transforms raw 3D prints into finished pieces. The best hobby tools for 3d print cleanup turn tedious cleanup work into a manageable part of your workflow. Whether you're printing miniatures, terrain, or functional parts, the right tools make all the difference between a rough prototype and a polished final product.
The tools you choose determine how much time you spend on each print, how clean your results look, and whether you actually enjoy the post-processing phase or dread it.
Most makers start with whatever they have lying around: kitchen knives, sandpaper from a hardware store, tweezers. This approach works for exactly one print, then frustration sets in. Proper hobby cleanup tools are designed for precision, durability, and the specific demands of printed materials. They're also affordable.
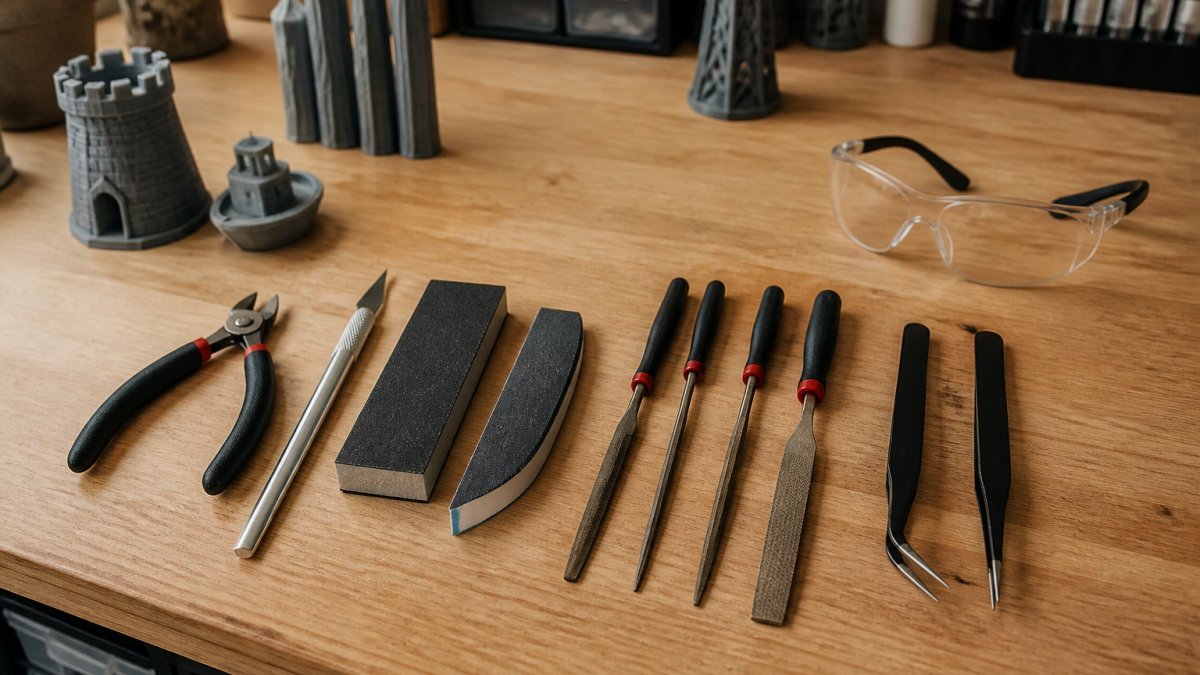
The tools fall into distinct categories: cutting and trimming, support removal, deburring, sanding, and precision finishing. Each category solves a specific problem in the post-processing workflow. Understanding what each tool does helps you build a kit that matches your printing style and the types of projects you tackle.
Tools to Remove Supports from 3D Prints
Support removal is where most cleanup time goes. The best approach uses multiple tools working together rather than forcing one tool to do everything.
Flush cutters are the foundation of any support removal workflow. These specialized pliers cut support material flush against the print surface, leaving minimal nubs to clean up. Unlike regular wire cutters, flush cutters have blades that meet flat, so they don't leave the angled cuts that require additional sanding.
A hobby knife or scalpel handles the nubs that flush cutters leave behind. The blade lets you scrape away remaining support material with controlled pressure. A sharp blade is critical here, dull blades require force, which risks slipping and damaging your print.
Needle files refine the areas where supports attached. These small, precise files smooth out the remaining material without taking away detail from your print. They're especially valuable for miniatures where support points are small and close to important details. A set of assorted needle files gives you options for different angles and surface areas.
Tweezers and precision picks remove loose debris and help position the print while you work. Tweezers with fine points let you grab tiny pieces without damaging surrounding areas. Some makers prefer curved tweezers for better visibility and control.
Safety glasses protect your eyes from flying support fragments. Support material can shatter unexpectedly, and even small pieces travel fast when tools slip. Wearing protection is non-negotiable, especially when working with harder materials like PETG or nylon.
| Tool | Primary Use | Best For |
|---|---|---|
| Flush cutters | Cutting supports flush | Initial support removal |
| Hobby knife | Scraping nubs | Detail cleanup |
| Needle files | Smoothing attachment points | Miniatures and fine details |
| Tweezers | Debris removal | Precision positioning |
| Safety glasses | Eye protection | All cleanup work |
Best Deburring Tool for 3D Prints
Deburring removes the rough edges and burrs left by the printing process. Layer lines create tiny ridges that catch light and feel rough to the touch. Deburring tools smooth these without removing material aggressively.
A deburring knife has a curved blade designed to catch and remove burrs without gouging the surface. The curved edge follows the contour of your print, removing only the raised edges. This precision prevents the over-sanding that happens when you use sandpaper on delicate geometry.
For cylindrical or curved surfaces, a rotary deburring tool works faster. These handheld tools spin a small burr or bit against the print surface, removing raised edges quickly. They're louder and messier than hand tools, but they save time on larger prints or production runs.
A micro-spatula serves double duty: removing burrs from small areas and scraping away support material from tight corners. The flat blade gives you control over depth and pressure. Many makers keep one micro-spatula dedicated to cleanup and another for paint mixing.
Heat-based finishing offers an alternative approach. A heat gun softens the surface layer slightly, melting the tiny ridges that create layer lines. This works best on prints made from materials that respond well to heat, like PLA. The technique requires practice to avoid warping your print, but the results are smooth without any sanding dust.
Sandpaper for 3D Prints: Grit Selection and Technique
Sanding is the most common finishing step, but grit selection makes or breaks the result. Using the wrong grit wastes time or damages your print.
Grit refers to the size of abrasive particles on sandpaper. Lower numbers (60-80) are coarse and remove material quickly but leave visible scratches. Medium grits (120-220) smooth those scratches and refine the surface. Fine grits (320-600) create the polished finish that looks professional. Very fine grits (800-1000+) are rarely needed for hobby prints but work for final polishing before painting.
Start with 120-grit sandpaper for initial surface smoothing. This removes layer lines and deburrs rough edges without taking excessive time. Sand in circular motions, applying light pressure. Heavy pressure removes material too quickly and can damage thin walls or fine details.
Move to 220-grit for the final sanding pass. This smooths the scratches left by 120-grit and prepares the surface for priming or painting. At this stage, your print should feel smooth to the touch.
Sanding blocks distribute pressure evenly and prevent the uneven wear that happens when sanding by hand. A block sized to fit your palm works for most surfaces. For curved or detailed areas, wrap sandpaper around a dowel or pencil to sand into corners.
Wet sanding reduces dust and produces a smoother finish. Dampen the sandpaper slightly and sand in circular motions. This technique works especially well with fine grits (320+) and takes longer but yields superior results for display pieces.
3D Printed Miniature Cleanup: Precision Finishing
Miniatures demand precision because every detail matters. A support mark on a character's face ruins the piece. Cleanup techniques for miniatures differ from larger prints because the scale is unforgiving.
Support placement is critical for miniatures. Ideally, supports attach to areas that won't be visible or are easy to hide. The back of a figure, the bottom of a base, or inside a hollow section are good choices. If your slicer places supports on the face or hands, reprinting with different support settings saves cleanup time.
Green Stuff World Green Putty – 20ml →
After removing supports, use a micro-spatula and fine needle files to smooth attachment points. Work slowly and check your progress frequently. A few seconds of aggressive scraping removes detail that took hours to print.
For painted miniatures, primer hides minor imperfections. A coat of primer designed for miniature painting creates a uniform surface and fills tiny scratches. Pewgilist carries the Green Stuff World Matt Surface Primer in black, white, and grey, which works on printed parts just as well as traditionally cast miniatures.
Sanding miniatures requires patience. Use fine grits (220+) and light pressure. Coarse sandpaper removes detail faster than you expect. Many experienced painters skip sanding entirely on miniatures, relying instead on primer and paint to hide layer lines.
Gaps between parts or between a miniature and its base show up immediately. Fill these with modeling putty before painting. The Green Stuff World Green Putty fills small gaps, seams, and surface imperfections. Apply a small amount, shape it to match the surrounding area, and let it cure before sanding smooth.

Safety Gear and Surface Preparation for Post-Processing
Post-processing involves sharp tools, fine dust, and chemical exposure. Proper safety gear protects you while making the work more comfortable.
Safety glasses are essential. Support material fragments and dust particles travel fast. A single piece in your eye ends your session and potentially causes injury. Wear glasses rated for impact protection, not just reading glasses.
A dust mask prevents inhalation of fine particles. Not all dust is equal, sanding creates particles small enough to reach your lungs. Use a mask rated N95 or better (the CDC). For wet sanding, a basic dust mask is sufficient since wet sanding produces minimal airborne particles.
Cut-resistant gloves protect your hands when using sharp tools. A slip with a hobby knife or scalpel draws blood quickly. Gloves reduce the risk and let you work faster without hesitating before each cut.
A well-organized workspace makes cleanup faster and safer. A small mat or cutting board contains debris and protects your work surface. Good lighting lets you see what you're doing, poor lighting leads to mistakes and accidents. A simple desk lamp or ring light costs little and eliminates shadow-based errors.
Ventilation matters when using adhesives or heat guns. Open a window or work near a fan. Some materials release fumes, especially when heated. Fresh air keeps you alert and prevents headaches.
Store your tools properly. A small toolbox or drawer organizer keeps everything accessible and prevents tools from getting damaged or lost. Sharp tools dull faster when tossed together in a drawer.
Tool Maintenance and Longevity
Quality tools last years with basic care. Maintenance costs nothing but prevents frustration.
Keep blades sharp. A dull hobby knife requires force, which leads to slips and accidents. Dull blades also damage your prints by crushing material instead of cutting cleanly. Sharpen blades with a honing stone or replace them when they dull.
Clean tools after each session. Support material residue hardens and builds up on cutters and files. Wipe tools with a dry cloth and occasionally wash them with soap and water.
Store tools in a dry place. Rust doesn't affect plastic-cutting tools much, but it damages the finish and makes tools less pleasant to use. A drawer or toolbox with a desiccant packet keeps everything in good condition.
Replace worn-out tools. Flush cutters eventually stop cutting cleanly as the blades dull. Files wear down with use. Rather than forcing dull tools to work, replace them.
Invest in quality from the start. Cheap tools frustrate you with every use. A good hobby knife, flush cutters, and needle file set cost $30-40 total and outperform budget alternatives by a wide margin.
Post-processing is where your prints go from functional to finished. The right tools make the difference between dreading cleanup and actually enjoying it.
Pewgilist stocks everything you need to set up a professional finishing station. Beyond tools, we carry primers like the Green Stuff World Matt Surface Primer and modeling putties that turn rough prints into display-ready pieces.

Frequently Asked Questions
What is the best tool for removing supports from 3D prints?
Flush cutters are the top choice for clean support removal. They cut close to the part without leaving large nubs. For delicate or detailed areas, a hobby knife or precision scalpel works better. Start by cutting away bulk material with flush cutters, then use a scalpel for fine detail work. Always wear safety glasses and work over a surface that catches debris. The goal is to minimize sanding work afterward.
What grit sandpaper should you use on a 3D print?
Start with 120-220 grit for rough surface removal and layer line smoothing. Progress to 400-600 grit for intermediate finishing, then 1000+ grit for a polished appearance. For FDM prints, begin coarse and work progressively finer to avoid clogging the sandpaper. Use a sanding block for flat surfaces and wrap sandpaper around dowels or files for curved areas. Always sand in one direction to maintain consistency.
How do you clean up detailed areas on a 3D printed miniature?
Precision is essential for miniature cleanup. Use a hobby knife or scalpel for thin support marks and layer lines in tight spaces. A needle file works well for smoothing small edges and crevices. For gaps between parts, apply Green Stuff World Green Putty ($5.99) to fill imperfections before sanding. A magnifying glass or jeweler's loupe helps you see what you're working on. Work slowly and make multiple light passes rather than aggressive cuts.
Should I sand my 3D print before or after painting?
Sand before painting. A smooth surface helps primer and paint adhere evenly and look professional. After sanding, prime your print with a quality primer like Green Stuff World Matt Surface Primer ($8.99) to create an even base. This step also fills micro-imperfections and ensures consistent color coverage. Paint adheres better to primed surfaces and lasts longer.