
Best PETG Filament for Outdoor Use: 2026 Buyer's Guide
Table of Contents
- Why PETG Filament for Outdoor Use Needs More Than a Weatherproof Label
- What Actually Breaks Down: UV Radiation, Heat, and Moisture
- ASA vs PETG for Outdoor Prints: Which One Holds Up Longer?
- How to Make 3D Prints UV Resistant Without Switching Materials
- PETG Filament Temperature Settings for Strong, Weather-Ready Parts
- Print Settings That Extend Outdoor Durability
- How to Choose the Best PETG Filament for Outdoor Use
- Frequently Asked Questions
Last Updated: September 23, 2026
Why PETG Filament for Outdoor Use Needs More Than a Weatherproof Label
Most filament listings slap "weather resistant" on the spool and call it a day. That label tells you almost nothing about how a printed part survives two summers on a fence post.
What Actually Breaks Down: UV Radiation, Heat, and Moisture
Three forces destroy outdoor prints, and they rarely work alone. Sunlight weakens the polymer, heat softens it, and moisture works its way into any gap between layers. Understanding each one tells you which fix matters most for your project.
UV Radiation and Polymer Chain Damage
Ultraviolet light breaks the long polymer chains that give PETG its strength. Over months of outdoor exposure, this shows up as chalky surfaces, faded pigmentation, and brittleness that turns a flexible clip into something that snaps.
Thermal Degradation and Heat Deflection Temperature
Heat deflection temperature is the point where a material starts to sag under load. PETG's sits lower than ASA's or ABS's, which matters on a car dashboard or a dark-colored outdoor mount in direct summer sun.
Moisture Absorption and Environmental Stress Cracking
PETG absorbs less water than nylon, but it is not hydrophobic. Left in humid air or rain, printed parts can develop environmental stress cracking at layer lines, especially under mechanical load.
ASA vs PETG for Outdoor Prints: Which One Holds Up Longer?
ASA wins on long-term outdoor durability; PETG wins on printability and cost. The right choice depends on how long the part needs to last and how much UV it will see. But the gap between them is not a single number, it shows up differently depending on heat, load, and sun exposure.
| Factor | PETG | ASA |
|---|---|---|
| UV resistance | Moderate, benefits from coating | High, inherently UV-stable |
| Heat deflection | Lower, typically around 158-176°F at 0.45 MPa | Higher, typically around 194-221°F at 0.45 MPa |
| Print difficulty | Easy, low warping | Harder, needs enclosure |
| Impact resistance | Good | Good |
| Layer adhesion | Strong when dialed in | Strong, but more sensitive to draft |
| Best for | Short-to-medium outdoor life | Long-term sun exposure |
Where PETG Actually Fails Outdoors
The failure mode is rarely a clean snap. It is a slow sequence:
- UV exposure breaks polymer chains at the surface, creating a chalky, brittle skin.
- Thermal cycling expands and contracts the part daily, working microcracks deeper along layer lines.
- Moisture enters those cracks and, under load, accelerates environmental stress cracking.
- Mechanical load, wind, weight, vibration, finishes the job at the weakest layer bond.
Structural Design for Outdoor PETG
Most outdoor PETG failures are design failures, not material failures. A few rules cut failure risk sharply:
- Wall thickness: three or more perimeters for any load-bearing part. Thin walls flex, and flexing opens layer lines to moisture.
- Infill: 40% or higher for brackets and mounts. Lower infill is fine for decorative pieces but not for anything carrying weight.
- Layer orientation: print so layer lines run perpendicular to the primary load direction. A hook printed with layers running across the pull direction will delaminate; the same hook with layers running along the pull direction holds far longer.
- Fillets and radii: sharp internal corners concentrate stress. A 2-3 mm fillet at a joint spreads load and delays crack initiation.
- Clearance for thermal expansion: large flat parts bolted to a rigid frame need slotted holes or slight clearance so they can move as they heat and cool. Without it, the part fights the frame and cracks at the fastener.
The Decision Rule
For a garden sign expected to last one or two seasons, PETG is the sensible pick. For a permanent fixture in full sun, ASA earns its extra hassle. For anything structural that sees both sun and load, either coat PETG and plan to reprint every few years, or print in ASA from the start.
How to Make 3D Prints UV Resistant Without Switching Materials
You can extend PETG's outdoor life without buying a different filament. Coatings, sealants, and smart design do most of the work, but only if you pick the right chemistry and apply it correctly.
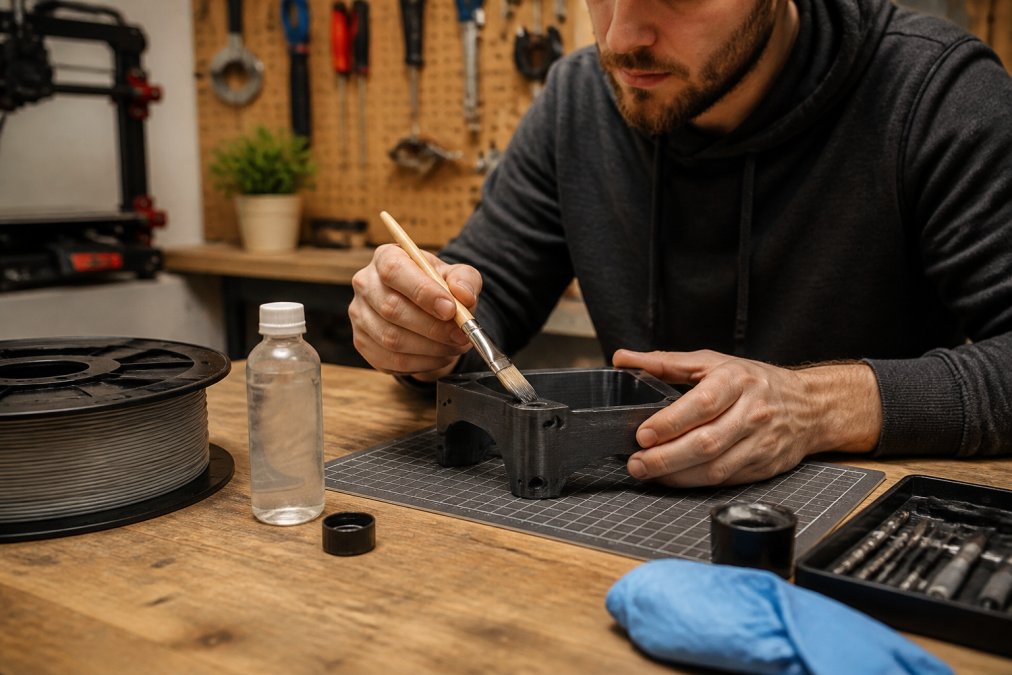
Coatings and Sealants That Actually Block UV
Not every clear coat blocks UV. Standard acrylic sprays protect against scratches, not sunlight. What you want falls into three practical categories:
- Aliphatic polyurethane clear coats, the same chemistry used in automotive clear coat. These resist yellowing and UV breakdown far better than acrylic. Look for products labeled "UV stable" or "non-yellowing" on the can.
- Automotive-grade 2K urethane, two-part systems that cure harder and last longer than rattle-can options. They cost more and require mixing, but a single application can outlast three or four spray-can reapplications.
- Marine-grade spar urethane, formulated for boat wood that sits in sun and saltwater year-round. It flexes with the substrate, which matters because PETG expands and contracts with temperature swings.
Application matters as much as the product:
- Sand the part lightly with 400-grit so the coating grips
- Clean off dust and oils completely with isopropyl alcohol
- Apply two or three thin coats, not one thick one
- Let each coat cure fully before the next, usually 30 minutes between coats, 24 hours before outdoor exposure
- Reapply annually for parts in constant sun; every two years for shaded parts
Design Choices That Reduce UV Exposure
Coating is reactive. Design is proactive. A few geometry decisions cut how much UV energy a part absorbs in the first place:
- Orientation: angle vertical surfaces so they shed water and receive glancing rather than direct sun. A 10-15 degree tilt on a bracket face reduces peak UV dose noticeably.
- Shading features: a small overhang or lip above a critical joint keeps direct sun off the layer lines most prone to stress cracking.
- Color: light colors, white, beige, light gray, reflect more solar energy and run cooler. A white PETG part in direct sun can sit 15-25°F cooler at the surface than the same part printed in black.
- Thickness: thicker walls resist UV penetration to the load-bearing core, but they also retain heat. Balance wall count against the part's thermal environment.
When Coating Is Not Enough
If a part sees full sun year-round and carries structural load, coating alone will not save it. That is the point where you either accept a shorter service interval and plan to reprint, or switch to ASA. The coating section above is about extending PETG's window, not eliminating its limits.
PETG Filament Temperature Settings for Strong, Weather-Ready Parts
Correct PETG filament temperature settings produce the layer bonding that outdoor parts depend on. Print too cool and layers separate; print too hot and the filament strings and sags.
A reliable starting range:
- Nozzle: 230-250°C
- Bed: 70-80°C
- Cooling fan: 30-50% after the first layer
- Print speed: moderate, to allow proper fusion
Print Settings That Extend Outdoor Durability
Settings shape structural integrity as much as material choice does. Thin walls and low infill density create weak points that fail first under outdoor exposure.
What matters most:
- Wall thickness: three or more perimeters for load-bearing parts
- Infill density: higher infill for parts under stress; 40% or more for brackets
- Layer height: thinner layers bond better, though they print slower
- Orientation: print so layer lines run across the load, not along it, to reduce mechanical failure risk
How to Choose the Best PETG Filament for Outdoor Use
The best PETG filament for outdoor use is one with consistent diameter, strong layer adhesion, and, ideally, UV-stabilizing additives. Everything else is secondary.
Here's what to check before you buy:
- Diameter consistency: look for tight tolerances, since filament extrusion variation causes jams and weak spots
- UV additives: some brands blend in UV stabilizers; check the spec sheet
- Color: lighter colors run cooler in the sun
- Reviews on layer adhesion: a filament that bonds poorly indoors will fail faster outdoors
- Storage: PETG still absorbs moisture, so keep spools dry
Frequently Asked Questions
Is PETG the best filament for outdoor use?
PETG works well for many outdoor projects because it resists moisture, handles moderate heat, and holds up to impact better than PLA. It is not the absolute best for long-term sun exposure; ASA outperforms it on UV stability. For parts that see occasional sun and regular rain, PETG filament for outdoor use is a solid, affordable pick. For permanent direct-sun installations, plan on a UV coating or consider ASA instead.
How long will PETG last outdoors?
There is no single answer because sunlight hours, temperature swings, and load all matter. PETG parts in shaded or partially covered spots commonly last several years. Parts in full sun with no UV protection can show color fading, surface chalking, and brittleness within a year or two. Coating the part and printing with thicker walls both extend the timeline noticeably.
Does PETG degrade in direct sunlight?
Yes, over time. UV radiation breaks polymer chains at the surface, which leads to fading, chalking, and small cracks that grow into structural failures. PETG handles UV better than PLA but not as well as ASA. A UV-stabilized PETG blend or an aftermarket clear coat slows the damage considerably, especially on thin walls and load-bearing parts.
What PETG filament temperature settings should I use for outdoor parts?
Most PETG spools print best with a nozzle between 230°C and 250°C and a heated bed at 70°C to 80°C. Running slightly hotter within that range improves layer adhesion, which matters for parts that will face weather and stress. Always check the spool label first, since blends with UV stabilizers or pigments can shift the sweet spot by 5°C to 10°C.
Outdoor prints fail for predictable reasons: UV, heat, and moisture, in that order of long-term damage. You can slow all three with the right filament, solid print settings, and a UV-blocking clear coat.
Pewgilist carries a curated range of PETG and other maker materials, backed by practical guides and a custom 3D printing service for one-off parts. Get started with Pewgilist and give your outdoor builds the durability they deserve.