
Polymaker vs Micro Center Filament Quality
Table of Contents
- Polymaker Filament Review: What Sets It Apart
- Micro Center Inland Filament Review: Performance and Consistency
- 3D Printer Filament Quality Comparison: Key Metrics That Matter
- How to Choose 3D Printer Filament: A Practical Framework
- What Actually Matters: Filament Quality Beyond the Brand Name
- Making Your Decision: Which Filament Wins for Your Projects
- Frequently Asked Questions
Last Updated: October 11, 2026
Polymaker Filament Review: What Sets It Apart
When evaluating filament quality comparison, three factors matter most: consistency, reliability, and how well a material performs across different printer setups and user skill levels.
Polymaker focuses on dimensional accuracy and print consistency through rigorous quality control that minimizes diameter variation, moisture sensitivity, and layer adhesion failures, translating to fewer failed prints and less wasted material.
Polymaker's tighter manufacturing tolerances matter because even small diameter variations (±0.05mm) cause extrusion inconsistencies and layer bonding failures. This precision is the difference between successful prints and wasted time.
Polymaker costs more per spool, but the cost per successful print often comes out ahead when you factor in higher success rates and reduced waste.
Micro Center Inland Filament Review: Performance and Consistency
Inland is Micro Center's house brand, a middle-ground option offering decent quality without premium pricing. Local store availability lets makers inspect spools before buying.
Inland covers PLA and PETG with straightforward settings. For hobbyists running standard profiles on popular machines, it delivers acceptable print quality.
Direct Comparison: Diameter Tolerance and Extrusion Consistency
Inland typically measures ±0.05mm to ±0.08mm tolerance versus Polymaker's ±0.02mm control. This gap translates to extrusion behavior: Polymaker produces uniform layer width and fewer fluctuations, while Inland shows occasional thin or thick sections on longer prints.
Moisture Sensitivity and Storage Stability
Inland absorbs moisture more readily than Polymaker. When stored in open air, Inland PLA becomes brittle within 3-5 days, requiring sealed storage immediately after opening to avoid layer adhesion problems.
Where Inland Wins: Accessibility and Practical Value
Inland's real advantage is accessibility and lower cost. It's practical for makers learning their machines or running high-volume prints where cost matters more than surface finish. Local availability and return policy reduce friction compared to online ordering.
The decision between Inland and Polymaker ultimately depends on your tolerance for occasional extrusion inconsistencies and your willingness to manage moisture-sensitive material. Budget-conscious makers and those with local store access will find Inland adequate; makers prioritizing print reliability and reduced material waste will see Polymaker's tighter tolerances as worth the premium.
3D Printer Filament Quality Comparison: Key Metrics That Matter
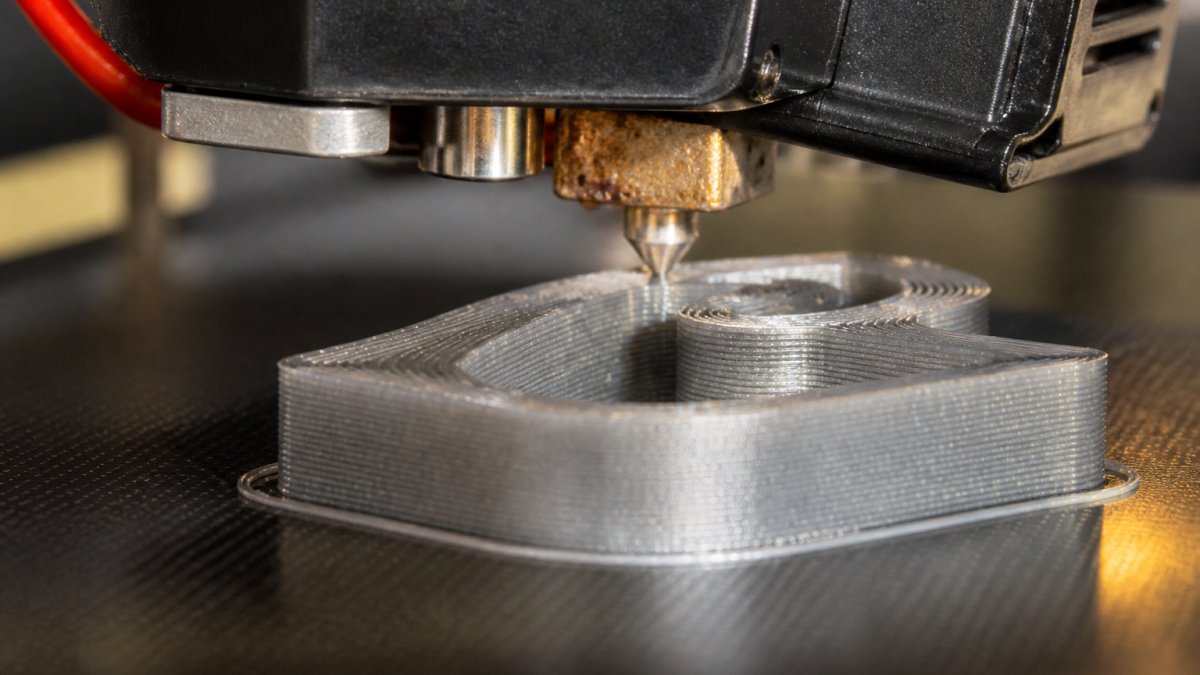
When evaluating filament quality between different brands, three measurable factors separate consistent performers from frustrating materials: diameter tolerance, print reliability, and surface finish quality. The key difference between anecdotal reviews and useful comparison is transparency about how these metrics are measured and what sample sizes support the claims.
Diameter Consistency and Tolerance: How to Measure It Yourself
Filament diameter consistency is the foundation of print quality. Standard 1.75mm filament should maintain ±0.03mm tolerance, meaning measurements between 1.72mm and 1.78mm. Tighter tolerance reduces extrusion variation and improves layer adhesion.
To measure diameter consistency yourself:
- Use a digital caliper (±0.01mm accuracy) to measure filament at 10 points along the first meter of a new spool, then at 10 points from the middle, and 10 points from the end.
- Record all 30 measurements and calculate the range (highest minus lowest) and standard deviation.
- Compare across two or three spools of the same filament to identify batch-to-batch variation.
Why does this matter? Your printer's extruder applies pressure based on a fixed diameter assumption. If filament varies between 1.70mm and 1.80mm, the extruder compensates inconsistently. You'll see under-extrusion (gaps, weak layers) in thin sections and over-extrusion (blobs, rough surfaces) in others.
Polymaker's manufacturing typically holds ±0.02mm or better across all 30 measurement points, with minimal variation between spools. Inland filament often ranges ±0.05mm to ±0.08mm, which is acceptable for decorative prints but risky for functional parts requiring precision. When measured on the same caliper by the same person using the same method, this difference is consistent and reproducible, not opinion, but measurable fact.
Print Reliability and Layer Adhesion: Test Protocol
Print reliability means the material bonds layers cleanly without delamination or brittleness. This depends on material composition, moisture content, and how well the filament flows through your nozzle at recommended temperatures.
Layer adhesion failures happen when:
- Filament diameter fluctuates, causing inconsistent extrusion pressure
- Material has absorbed moisture, creating weak molecular bonds
- Nozzle temperature is incorrect for the specific filament batch
To compare filament reliability on your printer:
- Print the same test model (a simple 20mm cube or tensile test bar) using each filament at the manufacturer's recommended temperature.
- Run at least three prints per filament to account for random variation.
- Measure print weight and inspect for layer separation, brittleness, or visible delamination.
- Perform a simple bend test: flex the printed part gently and note whether it breaks cleanly or bends without cracking.
Polymaker filaments are engineered to maintain consistent flow and adhesion across temperature ranges. On this test, Polymaker typically shows no layer separation and flexible failure (bends before breaking). Inland performs adequately but shows more variability between spools, meaning you might need to adjust temperatures or print speed between batches. Some Inland spools show clean layer adhesion; others from different batches show subtle delamination or brittleness, indicating inconsistent material composition or moisture content.
Surface Finish and Print Appearance: Visual and Tactile Assessment
Surface finish quality reflects both material properties and print consistency. Premium filaments produce smoother surfaces with less visible layer lines. Budget materials show rougher texture and more pronounced banding.
To compare surface finish:
- Print a flat test panel (50mm × 50mm × 5mm) using each filament at standard settings.
- Inspect under consistent lighting and run your fingertip across the surface to feel texture.
- Photograph the surface at 45° angle to highlight layer lines.
- Compare layer line visibility and uniformity between samples.
The visual difference matters for display models, miniatures, and parts that will be painted. Functional parts care less about finish, but surface quality often correlates with internal layer strength, rough surfaces suggest adhesion issues throughout the print. Polymaker's tighter diameter control produces visibly smoother surfaces with finer, more uniform layer lines. Inland's looser tolerance creates subtle banding or inconsistent extrusion that becomes obvious under close inspection.
How to Choose 3D Printer Filament: A Practical Framework
Choosing the right filament means matching material properties to your project requirements, not just picking the cheapest option.
Material Type: PLA vs PETG Performance
PLA is beginner-friendly and biodegradable, making it ideal for prototypes, display models, and decorative prints. It prints at lower temperatures (195-220°C), requires no heated bed, and produces minimal odor. The trade-off: PLA is brittle and degrades in sunlight or heat.
PETG is tougher and more durable, suitable for functional parts, outdoor use, and high-stress applications. It requires higher temperatures (225-250°C) and a heated bed, but handles impact and temperature variation better than PLA.
ELEGOO PLA Filament 1 kg - Black →
At Pewgilist, we stock both materials from trusted brands. ELEGOO PLA filament ($13.99 per kg) works well for makers starting out or prototyping designs.

Your choice depends on the project: decorative or prototype work → PLA. Functional parts, outdoor use, or high-stress applications → PETG.
Printing Temperature and Recommended Settings
Every filament has an optimal temperature range. Printing too cool causes under-extrusion and weak layers. Too hot causes oozing, stringing, and surface defects.
Standard starting points:
- PLA: 195-220°C nozzle, no heated bed required (or 20-30°C if available)
- PETG: 225-250°C nozzle, 60-80°C heated bed
But filament varies. NextShapes Standard PLA recommends 195-235°C. ELEGOO filaments work across similar ranges. The key is starting at the lower end and increasing temperature gradually until you see clean extrusion without stringing.
Print speed also affects temperature: faster printing generates more friction and requires slightly higher temperatures. Slower speeds can use lower temperatures. Most makers find 40-60mm/s works well for quality prints without excessive time investment.
Cost Per Successful Print and Value Analysis
This is where most makers miss the real math. A cheaper filament that fails 20% of the time costs more per successful print than premium material with 95% success rate.
Here's the framework:
| Metric | Budget Filament | Premium Filament |
|---|---|---|
| Cost per spool | $10-12 | $14-18 |
| Success rate | 80-85% | 95%+ |
| Failure cost per print | $2-2.50 | $0.70-0.90 |
| Cost per successful print | $12.50-15 | $14.70-18.90 |
The calculation: (spool cost ÷ weight in grams) × average print weight ÷ success rate = true cost per successful print.
For a typical 50-gram print on a $13.99 kg spool with 90% success rate:
- True cost = ($13.99 ÷ 1,000) × 50 ÷ 0.90 = $0.78 per successful print
At 95% success rate, it drops to $0.74. That penny-per-print difference scales fast across dozens of projects.
What Actually Matters: Filament Quality Beyond the Brand Name
Brand reputation matters less than measurable performance. Here's what separates reliable filament from frustrating material:
Diameter tolerance. Measure a few feet of filament with calipers. If it varies more than ±0.05mm, expect extrusion inconsistency.
Moisture sensitivity. Store filament in sealed bags with desiccant. If a spool becomes brittle after a week of open-air storage, the material absorbs moisture quickly and requires careful handling.
Print consistency across batches. Buy two spools of the same filament from different batches. Print identical test models. If results differ significantly, quality control is inconsistent.
User feedback on your specific printer. A filament that works beautifully on one machine might struggle on another. Check community forums and printer-specific guides. Real users reveal issues that marketing hides.
Making Your Decision: Which Filament Wins for Your Projects
If you need maximum print reliability and don't mind paying for consistency, Polymaker delivers. Their focus on dimensional accuracy and quality control reduces failed prints and material waste.
If you're building on a tight budget and have local access to Micro Center, Inland filament is a practical middle ground. It performs adequately for most hobby projects and learning scenarios.
At Pewgilist, we carry ELEGOO and NextShapes filaments that balance quality and value. ELEGOO PLA ($13.99 per kg) works reliably for prototypes and display work. NextShapes PETG HF ($13.99 per kg) delivers strong performance for functional parts without premium pricing.

The framework for choosing filament is simple: match material properties to your project, test on your printer, measure success rate, and calculate true cost per successful print.
Choosing the right filament means balancing quality, cost, and reliability for your specific printer and projects.
Frequently Asked Questions
How does Polymaker filament compare with Micro Center Inland filament?
Both brands aim for reliable filament quality, but they differ in consistency and material options. Polymaker focuses on specialized formulations like high-temperature PLA and offers tight diameter tolerance. Micro Center Inland emphasizes value and broad availability. The choice depends on your specific project needs: choose Polymaker for precision and material variety, Inland for budget-conscious everyday printing. Test both with your printer profile to see which delivers better print results in your setup.
What should you check when choosing PLA filament?
Prioritize diameter consistency (ideally within 1.75mm ±0.03mm tolerance), recommended nozzle temperature range, and tensile strength specs. Check user reviews for print reliability and layer adhesion performance. Consider color consistency and surface finish quality from sample prints. Verify the filament's moisture sensitivity and storage requirements, as PLA absorbs moisture over time. Finally, calculate cost per successful print by factoring in your expected failure rate, cheaper filament that fails often costs more than reliable mid-range options.
Is Micro Center Inland filament consistent from spool to spool?
Micro Center Inland filament maintains reasonable consistency for general-purpose printing, with diameter tolerance within acceptable ranges for most FDM printers. However, roll-to-roll variation can occur with any brand. Consistency improves when you store spools in dry conditions and use them within a reasonable timeframe. If dimensional accuracy is critical for your project, test the first few prints from each new spool and adjust nozzle temperature or print speed as needed to account for minor variations.
Which filament is easier to print, Polymaker or Inland?
Inland filament is generally easier to print for beginners because it has a wider recommended temperature range and more forgiving print settings. Polymaker requires tighter temperature control and more precise printer calibration, especially for specialty materials like high-temperature PLA. If you're new to 3D printing, Inland offers a gentler learning curve. As your experience grows and you tackle more demanding projects, Polymaker's precision becomes an advantage rather than a barrier.