
7 Green Stuff Uses Every Miniature Hobbyist Should Know
Quick Summary
Green stuff is a two-part epoxy putty that modelers knead together to sculpt, fill and repair miniatures. Once mixed, it cures into a hard, sandable material that bonds to plastic, resin and metal. Mix equal-volume parts until the color is uniform.
- Mix the two parts at a 1:1 ratio by volume, not by weight.
- Knead until the color is uniform, with no streaks of unmixed putty.
- Work in small batches, since mixed putty sets within minutes.
- Leave the repair undisturbed until fully hard before sanding or handling.
- Store unused parts sealed and separated so they do not react.
Table of Contents
- What Green Stuff Is and Why Modelers Rely on It
- How to Use Green Stuff for Miniatures: Mixing and Curing Step by Step
- Filling Gaps, Seams and Mold Lines
- Converting and Repairing Miniatures with Putty
- Liquid Green Stuff and When It Beats the Putty
- Green Stuff Alternatives and How They Compare
- Choosing Your Sculpting Kit and Your Next Project
- Frequently Asked Questions
7 Green Stuff Uses Every Miniature Hobbyist Should Know
Last Updated: November 15, 2026
What Green Stuff Is and Why Modelers Rely on It
Green stuff is a two-part epoxy putty that hobbyists use to sculpt, fill and repair miniatures. Makers use the material to shape detail onto figures, terrain and printed parts. The name comes from the classic green modelling putty, and the same kneadable epoxy idea is sold under other names.
The appeal is simple. Once the two parts are kneaded together, the putty sets into a hard, sandable material that bonds to plastic, resin and metal. You can build up a missing shoulder pad, bridge a gap between two pieces or carve a fine ridge that would be impossible to cut from plastic alone.
Modelers rely on it because it does several jobs with one product. A single pack can fill a seam, sculpt a new cloak fold and repair a snapped spear tip. That versatility is why green stuff remains a staple on almost every hobby bench.
How to Use Green Stuff for Miniatures: Mixing and Curing Step by Step
!Close-up of hands in nitrile gloves kneading two colored strands of epoxy putty on a clean workbench beside a hobby knife and a small figure
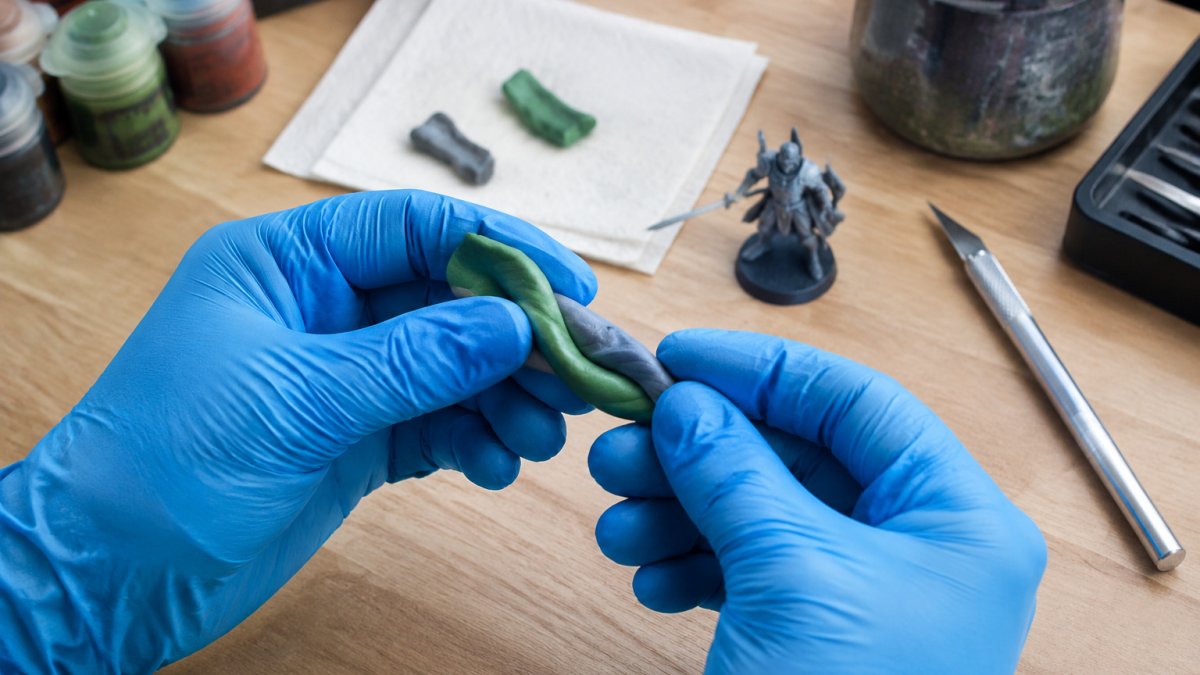
Using green stuff well depends on mixing it properly, working within its window and letting it cure fully. Most failed repairs trace back to one of these three steps rather than the material itself. This walkthrough covers the ratios, timing and recovery moves that the product listings skip.
Kneading the Two Parts Evenly
Cut off equal lengths of the two colors. The standard ratio is 1:1 by volume, not by weight, because the two components have different densities. Eyeballing equal strips is fine for gap filling; for structural sculpting, roll each part into a ball of the same diameter and compare them side by side before kneading.
Knead until the mixed putty is one uniform shade with no marbling. Streaks of unmixed color mean weak spots that can crack or peel later. Keep your hands slightly damp with water or wear nitrile gloves so the putty does not stick to your fingers. Water also acts as a lubricant on your sculpting tool, which stops the putty from dragging and lifting as you shape it.
Work in small batches. A pea-sized amount is enough for most gap-filling jobs, and a strip about the length of your little finger handles a typical shoulder pad or cloak fold. Leftover putty is harder to reuse cleanly once it has started to set, so mix only what you can place in the next few minutes.
Watch out: if the two parts are not fully blended, the cured patch will feel rubbery in spots and may crumble when you sand it.
Working Time, Curing and Shelf Life
Epoxy putty gives you a limited working window, usually measured in minutes, before it firms up. Standard green stuff stays workable for a limited window at room temperature, and sculptors often favor it for that reason. Shape your detail quickly, and wet your sculpting tool to stop the putty from dragging.
Curing takes longer than working time. The putty reaches a firm, carvable state after a period of hours, and full hardness takes longer. Leave the repair undisturbed until it is fully hard. Handling it early can leave fingerprints or deform fine detail. If you need to speed things up, a warm, dry spot helps, but do not put uncured putty near a direct heat source, because uneven heating can warp thin sections.
Shelf life is the step most hobbyists ignore. Store unused putty tightly sealed, away from heat and light. The two strips can be kept in separate bags or wrapped in cling film so they do not touch and start reacting at the edges. Old putty that has stiffened or gone crumbly will not mix evenly and will cure weak, so test a small pinch before committing it to a model.
Watch out: if the putty feels tacky and stringy after kneading, it is likely past its shelf life or was mixed in the wrong ratio, and it will not sand cleanly.
Filling Gaps, Seams and Mold Lines
Green stuff can be used for filling gaps where two parts of a model meet. Press a small amount into the seam, smooth it with a wetted finger or tool, and let it cure before sanding flush.
Mold lines on resin and plastic kits are a common target. A thin, well-smoothed layer can hide a mold line, which is often preferable to sanding it away, since sanding can remove surface detail. Work slowly, and avoid overfilling, because excess putty costs you more sanding time than it saves.
Converting and Repairing Miniatures with Putty
Conversions are where green stuff earns its place on the bench. You can add a new head, sculpt a backpack or change a weapon arm by building up putty over a pinned or glued base.
For repairs, a common approach is to glue the broken pieces with cyanoacrylate, then use putty to fill the joint and reshape any lost detail. Putty alone is not always strong enough for load-bearing joints, such as a spear shaft that carries weight.
Liquid Green Stuff and When It Beats the Putty
Liquid green stuff is a thinner, self-leveling epoxy that flows into tight gaps and fine recesses. Its strength is precision application: a fine tip lets you place material exactly where you need it, and it settles into detail without much pressure.
Green Stuff Alternatives and How They Compare
If you are weighing green stuff against other options, consider the trade-offs before you buy. The table below compares common choices by how they behave in typical miniature work, what they cost per use, and where each one falls short. These are general characteristics, so check each product's listing for exact specifications and current pricing.
| Option | Best for | Working style | Typical pack size | Relative cost per use | Typical drawback |
|---|---|---|---|---|---|
| Two-part epoxy putty | Sculpting, gap filling, repairs | Kneaded by hand | 8-36 in ribbon | Moderate; a little goes far | Limited working time |
| Liquid epoxy putty | Fine cracks and recesses | Flows and self-levels | Small bottle with fine tip | Higher per ounce, but used sparingly | Less bulk, not for sculpting |
| Plastic modelling putty | Light filling and smoothing | Ready to use | Small tube | Low upfront, but shrinks | Softer, can shrink or lift |
| Cyanoacrylate glue | Bonding parts | Instant set | 20 g bottle | Low per joint | Not a filler on its own |
Plastic putty is easier to start with because it needs no mixing, but it is not as durable for structural repairs and can shrink as it dries, which means a second pass is often needed. Cyanoacrylate is excellent for joining, yet it cannot build up volume; it is a bonding agent, not a sculpting medium. Liquid epoxy putty earns its place for pinholes and tight recesses where a kneaded strip cannot reach, but it is not a substitute for bulk shaping.
For most sculpting and repair jobs, two-part epoxy putty remains the more capable choice because it does the widest range of tasks with one pack. A single ribbon of standard green stuff can fill a seam, sculpt a cloak fold and repair a snapped spear tip, which is why it stays on almost every hobby bench even when the other products are also in the drawer.
Watch out: buying the largest pack to save money backfires if the putty hardens on the shelf before you use it, so match pack size to how much you actually sculpt in a few months.
Choosing Your Sculpting Kit and Your Next Project
Start with a small kit: a pack of two-part putty, a few sculpting tools, a wet palette or water pot, and a surface primer for finishing. If you want to learn how to get smooth finishes, read our guide to avoiding chalky paint finishes. Once you have sculpted and repaired a few pieces, prepare the surface for paint. For finishing, the Green Stuff World Acrylic Color Paint 17ml is an accessible choice, and Green Stuff World Wash Ink 17ml adds shading into recesses.
Frequently Asked Questions
What is Green Stuff putty used for?
Green stuff is a two-part epoxy putty used by miniature modelers to fill gaps and seams, repair broken parts, sculpt new details and convert kit pieces. Once mixed, it holds its shape while you work and then cures into a hard, sandable surface that accepts paint. Many hobbyists also use it to add small features like straps, pouches or armor plates to existing figures, which makes it one of the most versatile materials on the workbench.
How long does Green Stuff take to cure?
Most two-part epoxy putties, including classic green stuff, take several hours to reach a workable hardness and longer to cure fully. Warmer rooms speed curing, while cold conditions slow it down. Check the manufacturer's label for the exact working and cure times of your product, because formulas vary between brands.
Can you sand or paint Green Stuff after it cures?
Yes. Once fully cured, green stuff can be sanded with fine files, sanding sticks or wet sandpaper and then primed and painted like any other miniature surface. Sand gently to avoid tearing edges, and wash off any dust before priming. Cure it completely before sanding, since partially set putty can crumble or gum up the sandpaper.
What can I use instead of Green Stuff?
Common Green Stuff alternatives include other two-part epoxy putties, plastic putty, superglue combined with baking soda for gap filling, and modeling clay for sculpting that does not need to be permanent. Each option trades off working time, strength, sandability and cost, so choose based on whether you are filling a seam, sculpting fine detail or building a structural repair.
