
How to Choose PETG Filament for Miniatures?
Last Updated: October 28, 2026
Quick Summary
PETG filament suits miniatures that need to survive handling, since it bends before breaking and resists heat better than PLA. Its tougher, more flexible prints come at the cost of stringing and softer surface detail, so settings must be tuned. For display figures with fine detail, PLA usually fits better.
- PETG is tougher than PLA and bends before it chips, suiting gaming figures.
- Start PETG nozzle temperature around 230-240°C on small figures.
- Dry PETG filament, since moisture causes bubbling, stringing and weak prints.
- Use a standard 0.4 mm nozzle as the practical floor for most miniature work.
- Change one setting at a time when calibrating PETG for stringing.
Table of Contents
- Why PETG Is a Different Choice for Miniatures
- PETG vs PLA for Miniatures: Which Material Fits Your Figures
- Matching PETG Filament to Miniature Size and Use
- PETG Printing Settings for Miniatures
- How to Reduce PETG Stringing and Protect Fine Detail
- Painting 3D-Printed PETG Miniatures
- Pick Your First PETG Spool and Run a Test Print
- Frequently Asked Questions
Why PETG Is a Different Choice for Miniatures
Choosing PETG filament for miniatures is less about finding the "best" material and more about matching the material to the figure. Makers may reach for PETG because they want tougher prints than standard PLA, but stringing and softened detail can occur when setup work is skipped. PETG is a practical choice for miniatures that need to survive handling, but it asks more of your settings than most beginners expect.
PETG is a glycol-modified polyester that sits between PLA and ABS in toughness and heat resistance. That middle ground is exactly why it appeals to hobbyists who want figures and accessories that flex slightly rather than snap. The trade-off is that PETG tends to string and can blur the finest surface texture, so the material choice only pays off when the print profile is tuned for it.
PETG rewards patience. Dial in temperature, cooling, and retraction, and it can print clean, durable miniatures. Ignore those variables, and the same spool can frustrate you. The rest of this guide shows you how to make that choice with confidence.
PETG vs PLA for Miniatures: Which Material Fits Your Figures
PLA is the default for most miniature printing because it produces sharp detail with little fuss. PETG gives you durability and a bit of heat resistance in exchange for more demanding settings. Neither material is universally better. The right pick depends on how the figure will be used.
Choose PLA when you want maximum detail with minimal tuning, and the figure will sit on a shelf or see light use. Choose PETG when the miniature, terrain piece, or accessory will be handled often, dropped on a table, or stored in a warm car or game bag. PETG's flexibility helps it survive a knock that would chip a brittle PLA print.
| Factor | PLA | PETG |
|---|---|---|
| Fine detail | Sharper, cleaner | Slightly softer surface |
| Impact resistance | Brittle, can chip | Tougher, bends before breaking |
| Heat resistance | Lower | Higher |
| Stringing | Minimal | Common without tuning |
| Print difficulty | Beginner-friendly | Needs tuned settings |
If your figures are display pieces, PLA usually wins. If they are gaming pieces that take abuse, PETG is worth the extra effort.
Matching PETG Filament to Miniature Size and Use
Start by asking how the miniature will live. A small, delicate figure for display needs different treatment than a larger terrain piece for a gaming table. For tabletop gaming pieces that get handled, PETG's toughness is a real advantage. For tiny, detailed figures where every facial feature matters, you may decide the surface softness is not worth it.
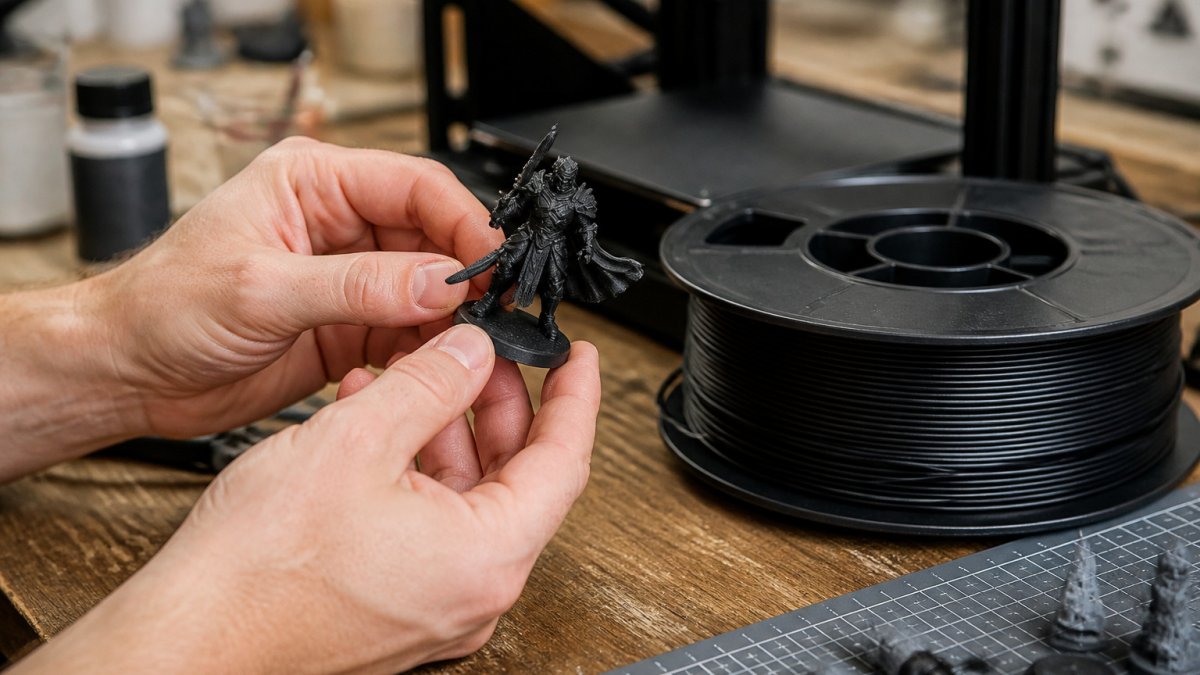
Think about size as well. Smaller figures print more quickly and have less mass to absorb stress, so PETG's flexibility is less critical on tiny parts. Larger bases, weapons, and terrain pieces benefit more from PETG's toughness, since they carry more stress and are more likely to be dropped.
Use this quick rule of thumb:
- Display figures with fine detail: consider PLA first
- Gaming figures and accessories handled often: PETG is a strong choice
- Terrain, bases, and functional pieces: PETG is usually the better fit
We recommend starting with a single PETG spool for one project before committing to a full set of figures. That way you learn your printer's behavior on a small batch.
Filament Diameter, Color and Moisture Control
Most miniature printers use 1.75 mm filament, so confirm your printer's spec before you buy. Consistent diameter matters because variation causes under- and over-extrusion, which shows up as blobs and weak lines. Buy from a source that states diameter clearly, and check the spool label.
Color also affects the finished look. Darker PETG hides small imperfections better than light colors, which is useful for miniatures you plan to leave unpainted.
NextShapes PETG HF – Core Colors – 1.75mm 1KG Cardboard Spool →
Moisture is the hidden problem. PETG absorbs water from the air, and damp filament produces bubbling, stringing, and weak prints. Store spools sealed with desiccant, and dry them if they have been exposed for a long time. Dry filament is one of the easiest ways to improve results without touching a single setting.
PETG Printing Settings for Miniatures
Start from the manufacturer's range and treat the numbers below as a baseline, not gospel. For the NextShapes PETG HF filament in our catalog, the recommended nozzle temperature is 225-255°C. On small figures, begin near the lower-middle of the range, around 235°C, because excess heat is what softens edges and feeds stringing.
Starting slicer profile for miniature-scale PETG
| Setting | Starting value | Why it matters on miniatures |
|---|---|---|
| Nozzle temperature | 230-240°C | Lower end holds sharp edges; too low weakens layer bonding |
| Bed temperature | 70-80°C | Stable first layer on small bases; reduces corner lift |
| Layer height | 0.12-0.16 mm | Captures detail without ballooning print time |
| Line width | 0.38-0.42 mm (0.4 mm nozzle) | Slightly under nozzle diameter improves surface finish |
| Wall count | 3 perimeters | Thin walls on small parts need redundancy |
| Print speed (outer wall) | 25-35 mm/s | Slower outer walls preserve fine features |
| Print speed (infill) | 40-50 mm/s | Faster interior keeps total time reasonable |
| Cooling fan | 30-50% after layer 3 | Too much fan causes layer separation; too little softens detail |
| Retraction distance | 4-6 mm (direct drive lower, Bowden higher) | Pulls molten filament back before travel |
| Retraction speed | 25-40 mm/s | Faster retraction reduces wisps without grinding filament |
| Travel speed | 150-200 mm/s | Less time over open space means fewer strings |
| Z-hop | 0.2-0.4 mm | Lifts nozzle over printed detail on travel |
Nozzle size and realistic detail limits
A standard 0.4 mm nozzle is the practical floor for most FDM miniature work. A 0.25 mm nozzle will resolve finer facial and armor detail but roughly doubles or triples print time and clogs more easily with PETG's tendency to ooze. A 0.6 mm nozzle is fine for terrain and bases but will visibly round off small features. Match nozzle size to the part: 0.25-0.4 mm for character figures, 0.4-0.6 mm for terrain and functional pieces.
Calibration workflow that actually works
- Print a temperature tower in the 225-250°C range and pick the lowest band with clean layer adhesion.
- Print a retraction test at that temperature and adjust distance in 0.5 mm steps.
- Print a small detail test, a face, a hand, or a weapon, and inspect under raking light.
- Change one variable per print. Two changes at once and you will not know which one helped.
How to Reduce PETG Stringing and Protect Fine Detail
Stringing is the most common complaint with PETG, and it is largely a settings problem. Thin wisps of filament form when the nozzle travels across open space while still hot. Fixing it usually means combining a few small changes.
Try these steps in order:
- Dry your filament if it has been exposed to air.
- Lower the nozzle temperature in 5°C steps.
- Increase retraction distance and speed slightly.
- Raise travel speed so the nozzle spends less time over open space.
- Enable "avoid crossing perimeters" in your slicer if available.
To protect fine detail, reduce print speed on the outer walls and keep the cooling fan steady. A slightly lower temperature also helps sharp edges hold their shape. Expect some trade-off, because the settings that reduce stringing can soften the finest details, so test on a small figure before printing a full batch.
Painting 3D-Printed PETG Miniatures
Prepare printed miniatures before painting. To avoid a chalky finish once your print is primed, thin your layers and use quality acrylics. Remove stringing with a hobby knife or a quick pass with a heat tool, then wash the print to clear dust and oil from handling. A light primer coat helps paint grip the surface, and it reveals layer lines and small flaws you can fix before color goes on.
Watch out: sealing a PETG print with a solvent-heavy varnish can soften the surface, so test any finish on a scrap piece first.
Pick Your First PETG Spool and Run a Test Print
The NextShapes PETG HF Core Colors spool is $13.99 for 1 kg, and the ELEGOO Rapid PETG Black spool is $13.99 for 1 kg.

Before printing a full set, run a small calibration test. Use a simple test piece with fine features, a flat base, and some overhangs. Print it, inspect for stringing and detail loss, adjust one setting, and print again. A few test cycles will tell you more than any guide can.
Frequently Asked Questions
Is PETG a good filament for 3D-printed miniatures?
The NextShapes PETG HF listing describes the filament as tough and suitable for functional parts, organizers, brackets, cases, prototypes, and other projects that benefit from PETG durability.
What nozzle temperature is best for PETG miniatures?
The recommended nozzle temperature for NextShapes PETG HF is 225-255°C.
Does PETG string more than PLA?
Yes, PETG generally strings more than PLA because it stays more fluid at nozzle temperature. Stringing shows up as thin hairs between separate parts of a print. Reducing nozzle temperature, increasing retraction distance and speed, and keeping the filament dry all help. Drying PETG before printing is one of the most effective fixes when strings appear across a print that otherwise looks correct.
