
How to Prevent Silk PLA Print Failure: 7 Steps
Table of Contents
- Why Silk PLA Prints Fail: Common Causes
- Step 1: Dial in Silk PLA Temperature Settings
- Step 2: Configure Silk PLA Retraction Settings
- Step 3: Reduce Print Speed for Better Quality
- Step 4: Perfect Your First Layer and Bed Adhesion
- Step 5: Prevent Nozzle Clogging and Filament Grinding
- Step 6: Manage Filament Moisture and Storage
- Step 7: Troubleshoot Layer Separation and Stringing
- Getting Started with Quality Silk PLA
- Frequently Asked Questions
Last Updated: September 30, 2026
Why Silk PLA Prints Fail: Common Causes
Silk PLA's glossy finish is beautiful, but that appeal comes with real challenges. Temperature mismanagement, aggressive retraction, and high print speeds are the primary culprits behind failures. The good news: most problems are fixable with the right adjustments. This guide walks you through seven concrete steps to prevent silk PLA print failure and get consistent, professional results.
Step 1: Dial in Silk PLA Temperature Settings
Your nozzle temperature is the foundation for everything else. Silk PLA typically prints between 200°C and 220°C, but your specific printer needs its own tuning. Start at 210°C and print a test piece. Watch the first layer closely. If plastic flows smoothly and layers bond well, you're in range. If it looks stringy or droopy, drop the temperature 5 degrees. If it's thin and weak, raise it 5 degrees.
Finding Your Ideal Nozzle Range
Do a temperature tower test to map how your specific setup handles heat. Look for a smooth, glossy surface finish, strong layer bonding with no gaps, no stringing between parts, and consistent extrusion width.
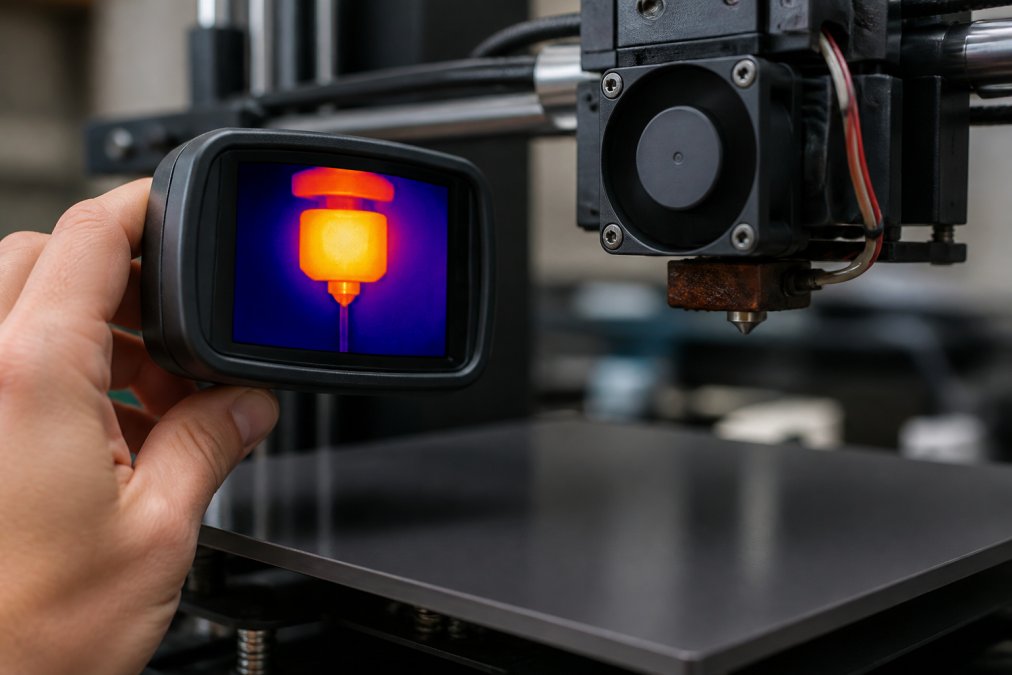
Managing Heat Creep
Heat creep happens when thermal energy travels up the nozzle into the cold zone where filament sits, causing the filament to soften, expand, and jam. You'll recognize it by sudden extrusion stops mid-print or clicking sounds from the extruder.
Prevent it by checking your cooling fan (the small fan above the nozzle should spin at full speed), verifying hotend assembly connections are tight when cold, and using quality filament with consistent diameter. Silk PLA from trusted sources like ELEGOO PLA Silk Filament reduces these variables and minimizes heat buildup.

Step 2: Configure Silk PLA Retraction Settings
Retraction pulls filament backward between moves to stop oozing. Silk PLA is sensitive to aggressive pulling because the material grinds easily under pressure. Optimal retraction varies by slicer software and extruder type.
Slicer-Specific Retraction Profiles
Cura (Ultimaker Cura 5.x and later):
- Retraction Distance: 6 mm (direct-drive), 9 mm (Bowden)
- Retraction Speed: 45 mm/s
- Z Hop When Retracted: 0.2 mm
- Retraction Extra Prime Amount: 0 mm
PrusaSlicer (version 2.5+):
- Retraction Length: 0.8 mm (direct-drive), 1.2 mm (Bowden)
- Retraction Speed: 40 mm/s
- Deretraction Speed: 35 mm/s
- Z Lift on Retraction: 0.2 mm
Orca Slicer (based on Bambu Studio):
- Retraction Distance: 5 mm (direct-drive), 8 mm (Bowden)
- Retraction Speed: 50 mm/s
- Z Hop Distance: 0.3 mm
- Wipe on Retract: disabled for silk PLA
Understanding Retraction Failure Modes
Stringing (thin plastic threads between parts): Indicates insufficient retraction distance or speed. Fix by increasing retraction distance by 0.5-1 mm first, then speed by 5 mm/s if needed.
Blobs or rough spots at retraction points: Indicates over-retraction or excessive Z-hop. Fix by reducing retraction distance by 0.5 mm or lowering Z-hop to 0.1 mm.
Clicking or grinding sounds from extruder: Indicates filament jamming due to nozzle resistance. Fix by reducing retraction speed to 35 mm/s, checking filament moisture, and verifying the nozzle is clean.
Oozing or small blobs even with retraction enabled: Indicates nozzle temperature too high. Fix by lowering nozzle temperature 2-3°C before adjusting retraction.
Testing Your Retraction Settings
Print a retraction tower model to isolate the variable. Download a retraction tower STL, slice it with your baseline settings, print and examine each section, then adjust one parameter at a time and reprint. A retraction test takes 30-45 minutes and saves filament on failed full prints.
Why Silk PLA Needs Lower Retraction Speed
Silk PLA has a lower glass transition temperature than standard PLA. When pulled back at high speed, friction and pressure inside the nozzle heat the filament. Soft filament deforms under pressure, and the extruder gear digs into it instead of gripping cleanly. Slower retraction speed (40-50 mm/s) gives the filament time to cool slightly as it's pulled back, reducing deformation and grinding risk.
Common Retraction Mistakes with Silk PLA
Don't use standard PLA settings as a starting point, they're too aggressive. Increase retraction speed before distance; more distance increases grinding risk. Disable wipe-on-retract because silk PLA's glossy surface is sticky. Account for Bowden tube friction by using the slicer-specific Bowden distances above. Fine-tune in small increments and document your final settings.
Step 3: Reduce Print Speed for Better Quality
Print speed directly controls thermal load. Higher speed increases volumetric flow rate, which requires higher pressure inside the nozzle and generates more friction and heat. Silk PLA's polymer chains are more sensitive to heat than standard PLA, causing degradation: the glossy coating breaks down, the plastic becomes brittle, and layer bonding weakens.
Speed Profiles by Print Feature
First Layer: 20-25 mm/s. First layer adhesion determines everything. Slow speed gives material time to bond to the bed and cool before the next layer lands.
Perimeters (outer walls): 35-45 mm/s. Perimeters determine surface quality and dimensional accuracy. Slow perimeters mean sharp corners and smooth surfaces where silk PLA's glossy finish shows.
Infill (interior structure): 50-60 mm/s. Infill doesn't affect surface quality, but rushing it (80+ mm/s) creates weak internal structure that delaminates under stress.
ELEGOO PLA Silk Filament 1 kg - Gold →
Travel moves (nozzle movement without extrusion): 100-150 mm/s. Travel moves don't extrude, so speed doesn't affect quality. Fast travel reduces print time without thermal stress.
Recommended Starting Speeds by Printer Type
Direct-Drive Extruders: Perimeter 40 mm/s, Infill 55 mm/s, First layer 20 mm/s, Travel 120 mm/s
Bowden Extruders: Perimeter 35 mm/s, Infill 45 mm/s, First layer 20 mm/s, Travel 100 mm/s
Diagnosing Speed-Related Failures
Layer separation or delamination: Print speed too high, layers cooling too fast. Fix by reducing perimeter and infill speed by 10 mm/s and increasing nozzle temperature 2-3°C.
Thin or weak extrusion lines: Volumetric flow rate too high. Fix by reducing speed 10 mm/s and checking nozzle temperature.
Rough or bumpy surface finish: Layers not cooling enough before next layer deposits. Fix by reducing perimeter speed 5-10 mm/s and increasing cooling fan speed to 100%.
Stringing or oozing between parts: Speed too high, temperature too high, or retraction insufficient. Fix by reducing speed 5 mm/s first, then adjusting retraction settings.
Incremental Speed Increases
Once you have a baseline that works, increase perimeter speed by 5 mm/s on the next print. If that succeeds, increase infill speed by 5 mm/s. Keep incrementing until you see failures, then back off to the last successful speed. Document your final speeds for future reference.
Step 4: Perfect Your First Layer and Bed Adhesion
Your first layer determines whether the rest of the print succeeds. Silk PLA benefits from a slightly warmer bed than standard PLA, use 60-70°C instead of 50-60°C. The extra heat helps the material stick without degrading it.
Level your bed properly by heating the bed and nozzle to printing temperature, using a piece of standard paper as a feeler gauge, adjusting each corner until you feel consistent resistance, moving to the center to check, and re-checking all corners as they shift during heating.
Consider your build plate surface. Textured surfaces (PEI sheets, textured PEI) grip silk PLA better than smooth glass. If using glass, clean it with isopropyl alcohol before each print. Some makers apply adhesive spray or bed adhesion compound, which helps if you're struggling with warping.
Step 5: Prevent Nozzle Clogging and Filament Grinding
A clogged nozzle stops extrusion instantly. Filament grinding happens when the extruder gear can't push material through resistance and spins against the filament, chewing it up.
Moisture in filament causes expansion inside the nozzle, creating resistance.
Step 6: Manage Filament Moisture and Storage
Humidity is silk PLA's enemy. Wet material expands inside the nozzle, building pressure and causing inconsistent extrusion, weak layers, and separation.
Step 7: Troubleshoot Layer Separation and Stringing
If you've dialed in temperature and retraction but still see problems, these two issues are most likely.
| Problem | Primary Cause | Quick Fix |
|---|---|---|
| Layer separation | Low temperature or speed | Raise temp 5°C, reduce speed 10 mm/s |
| Stringing | Weak retraction | Increase distance 1-2 mm |
| Nozzle clog | Moisture or debris | Dry filament, cold pull nozzle |
| Heat creep | Cooling fan failure | Clean and verify fan operation |
| Under-extrusion | Filament grinding | Check extruder gear, reduce speed |
Getting Started with Quality Silk PLA
Silk PLA rewards precision. Small adjustments compound. The material itself matters too, inconsistent filament makes every problem worse. When your silk PLA comes from a trusted source with quality control, you're solving for your printer's quirks, not fighting the material.
Frequently Asked Questions
What temperature should I use for silk PLA?
Silk PLA typically prints best between 210°C and 230°C, depending on your specific printer and filament brand. Start at 220°C and test a small print. If you see under-extrusion or rough surfaces, raise the temperature by 5°C. If the filament oozes or strings excessively, lower it by 5°C. ELEGOO Silk PLA filaments perform well in this range. Always check your filament's datasheet for the manufacturer's recommended range.
Why does silk PLA clog my nozzle so easily?
Silk PLA's glossy finish and composition make it more prone to heat creep, where filament softens inside the hotend before reaching the nozzle. This causes the filament to expand and jam. Prevent clogging by using adequate cooling around the hotend, keeping print speed moderate (40-60 mm/s), and ensuring your nozzle temperature isn't too high. A clogged nozzle often signals that your thermal management needs adjustment rather than a filament quality issue.
What print speed works best for silk PLA?
Silk PLA prints best at 40-60 mm/s for general prints, with first layers at 20-30 mm/s. Slower speeds allow better layer adhesion and reduce stringing, which silk PLA is prone to. If you're experiencing layer separation or poor surface finish, drop to 50 mm/s. Faster speeds (above 80 mm/s) increase the risk of filament grinding, heat creep, and nozzle clogging. Quality silk PLA like ELEGOO benefits from patience, slower prints yield the glossy finish you're paying for.
How do I fix poor layer adhesion in silk PLA prints?
Poor layer adhesion usually stems from under-extrusion or insufficient bed temperature. First, level your bed carefully and set your z-offset so the first layer squishes slightly. Increase nozzle temperature by 5-10°C to improve flow. Check your extrusion multiplier in your slicer (start at 1.0) and raise it to 1.05-1.10 if lines look thin. Reduce print speed to 50 mm/s for the first few layers. If problems persist, your filament may have absorbed moisture, dry it in an oven at 50°C for 4 hours and retry.