
Why Your 3D Prints Fail: A Troubleshooting Guide
Table of Contents
- Why Your 3D Prints Fail: Common Causes
- Identifying Common Print Failure Types
- 3D Printer Bed Leveling Guide
- Troubleshooting Nozzle Clogs and Heat Creep
- Best Filament Storage Practices
- How to Calibrate Extrusion Rate
- Common 3D Printing Defects and Solutions
- Preventative Maintenance and Environmental Factors
- Frequently Asked Questions
Last Updated: September 28, 2026
Why Your 3D Prints Fail: Common Causes
If your 3D prints fail regularly, tangled filament, peeling models, mid-print collapses, you're not alone. Most failures follow predictable patterns. Once you understand the cause, you can fix it and get back to making.
3D prints fail for mechanical reasons (unlevel bed, clogged nozzle), material issues (moisture, inconsistent diameter), or settings problems (extrusion rate, speed, temperature). The key is diagnosing which problem you're facing, then applying the right fix.
Identifying Common Print Failure Types
Knowing what went wrong is half the battle. Different failures leave different clues. Learn to read these signs, and you'll pinpoint the root cause faster.
Warping and Layer Separation
Warping happens when your print cools unevenly and pulls away from the bed. You'll see corners curl up or the model twist. Layer separation occurs when layers don't stick properly, creating gaps or weak points. Warping typically affects larger prints or materials like ABS and PETG. Layer separation usually means your extrusion rate is too low or your nozzle is too far from the bed.
Check these first:
- Is your bed level? Even a 0.1mm difference matters.
- Is your bed temperature correct? Lower temps reduce warping but increase adhesion risk.
- Are you using an adhesion promoter? A primer helps materials stick better.
Green Stuff World Matt Surface Primer is a water-based option that creates an even surface for better adhesion. Apply it to your build plate before printing, and it helps materials grip consistently.

Stringing and Blobbing
Stringing is thin filament connecting separate parts; blobbing is small bumps of extra material. Both stem from nozzle oozing: as the nozzle moves between sections, molten plastic drips out, or pools when the nozzle pauses.
Control stringing with retraction distance (5-7mm), retraction speed (40mm/s), and Z-hop (lifting the nozzle between moves). Enable retraction and increase values gradually if stringing persists.
Under-Extrusion and Over-Extrusion
Under-extrusion produces thin walls and gaps; over-extrusion makes walls thick and features blob. Under-extrusion signals a partial clog, inconsistent filament diameter, or low extrusion rate. Over-extrusion comes from high temperature, low speed, or aggressive extrusion rate.
Quick checks:
- Can you see gaps between wall lines? That's under-extrusion.
- Are features mushy and poorly defined? That's over-extrusion.
- Does the problem happen mid-print? Your nozzle may be clogging gradually.
3D Printer Bed Leveling Guide
A level bed is the foundation of successful printing. If it isn't level, your prints will fail regardless of other settings.
Why Bed Leveling Matters
Bed leveling sets the nozzle-to-surface distance. Too close and the nozzle scrapes; too far and filament won't stick. The ideal gap is 0.1mm. An unlevel bed creates a gradient, causing adhesion problems in some areas and over-extrusion in others.
Step-by-Step Leveling Process
Step 1: Heat bed and nozzle to printing temperature for accurate results. Step 2: Home your printer. Step 3: Move the nozzle to one corner. Step 4: Lower the nozzle until a piece of paper slides under it with slight resistance. Step 5: Adjust the leveling screw (clockwise to raise bed, counterclockwise to lower). Step 6: Repeat for all corners until paper resistance is consistent. Step 7: Check the center and re-level if needed. Leveling is iterative; aim for consistency across all points.
Troubleshooting Nozzle Clogs and Heat Creep
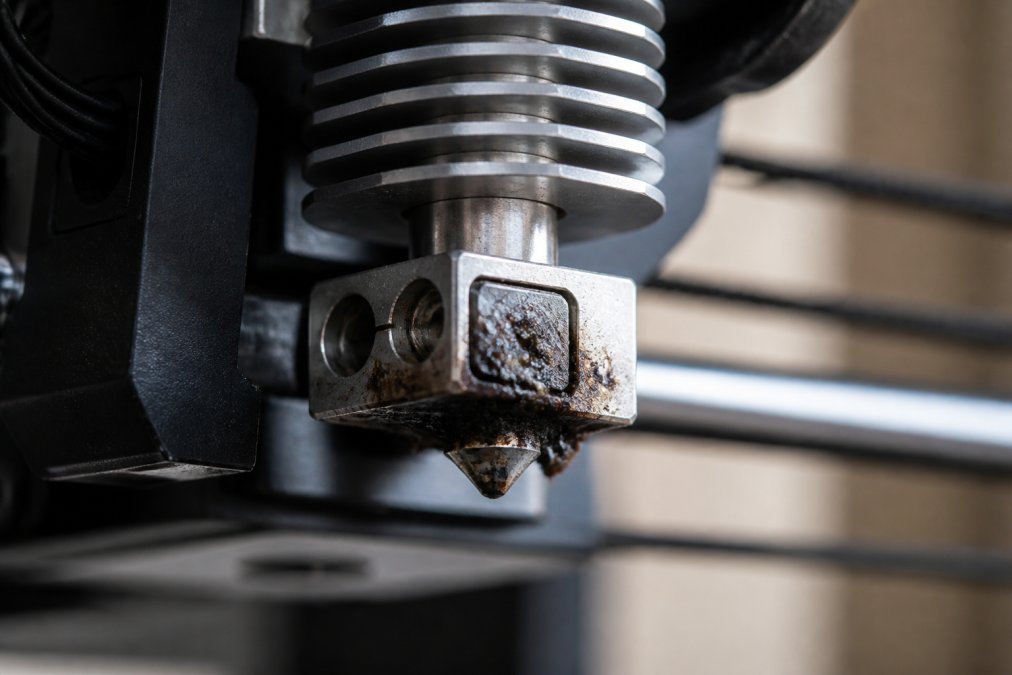
A clogged nozzle stops your print dead. Heat creep, when heat from the nozzle travels up into the filament path, causes jams that feel like clogs but require different fixes.
Recognizing Nozzle Clog Symptoms
A clogged nozzle produces little or no filament output, causing under-extrusion or mid-print failure. Heat creep occurs higher in the printer when heat travels into the filament path, softening it and jamming the drive mechanism (you'll hear clicking or grinding). Both worsen if ignored.
Clearing and Preventing Clogs
To clear a clog: Heat the nozzle and remove filament. Push a cleaning filament up through the nozzle from the bottom, working gently until resistance disappears. If needed, use a needle or thin wire from the top. Never force anything or you'll crack the nozzle.
Best Filament Storage Practices
Filament absorbs moisture from the air. Wet filament prints poorly, it bubbles, produces weak parts, and can cause clogs. Proper storage keeps your material dry and ready to print.
Moisture Absorption and Filament Degradation
Filament absorbs moisture from humid air, especially hygroscopic materials like nylon and PETG. Wet filament produces steam, popping sounds, rough surfaces, and brittle parts. Preventing moisture damage is cheaper than replacing ruined spools.
Proper Storage Solutions
Store filament in airtight containers with desiccant packs or vacuum-sealed bags. Check desiccant color regularly and replace when saturated. For frequent use, a dry box with active desiccant keeps filament ready. Store in a cool place away from heat sources.
How to Calibrate Extrusion Rate
Your extrusion rate tells your printer how much filament to push. If this number is wrong, every print suffers. Calibrating it takes 30 minutes and fixes under- and over-extrusion permanently.
Green Stuff World Green Putty – 20ml →
Why Extrusion Calibration Matters
Extrusion rate is a multiplier that controls filament flow. Your slicer calculates how much plastic is needed, then your printer applies the extrusion rate to that number. If the rate is 95%, your printer pushes 5% less filament than calculated. If it's 105%, you get 5% extra.
Calibration Steps and Adjustment
Step 1: Print a calibration cube. This is a small hollow cube (usually 20mm × 20mm × 20mm) designed to test extrusion. Download one from your slicer's library or from a maker community site.
Common 3D Printing Defects and Solutions
Most failures fall into a few categories. Knowing these patterns helps you diagnose problems quickly.
First Layer Adhesion Problems
Your first layer is everything. If it doesn't stick, the print fails immediately. If it sticks too hard, you'll damage your build plate trying to remove it.
Solutions:
- Re-level your bed, focusing on consistent nozzle height
- Clean your build plate with isopropyl alcohol and let it dry completely
- Use an adhesion promoter like Green Stuff World Matt Surface Primer for better grip
- Try a textured build surface if your current one is smooth
- Raise your bed temperature slightly, warmer beds improve adhesion
Support Structure Failures
Supports hold overhanging sections while printing. They're temporary scaffolding that you remove after printing. Bad support placement or density causes the model to collapse or leaves ugly scars.
Common support mistakes:
- Too few supports for large overhangs
- Supports touching critical surfaces
- Support density too low, causing them to break during removal
- Supports placed in the wrong orientation
Print Speed and Thermal Issues
Printing too fast overwhelms your printer's ability to melt and extrude filament. The nozzle can't keep up with demand, creating under-extrusion. Printing too slow can cause over-extrusion or stringing.
Typical print speeds:
- Fine detail work: 30-50mm/s
- Standard prints: 50-80mm/s
- Fast printing: 80-120mm/s
Preventative Maintenance and Environmental Factors
Print failures often come from neglect. A simple maintenance routine catches problems before they ruin your prints.
Regular Maintenance Checklist
Check these items every 10 prints:
- Bed level (nozzle height at all corners)
- Nozzle cleanliness (no plastic buildup)
- Cooling fan operation (spinning freely, no noise)
- Build plate surface (clean, no scratches or dents)
- Filament condition (no tangles, moisture, or damage)
Every 20 prints:
- Extruder drive gear (no plastic dust clogging it)
- Belts and pulleys (tight, no slipping)
- Heated bed connection (stable, no loose wires)
- Z-axis smooth rods (clean, no debris)
Every 50 prints (or when you notice issues):
- Nozzle replacement (wear increases over time)
- Deep clean of the hot end assembly
- [ ]
Maintenance takes 15 minutes per session. It prevents hours of troubleshooting and wasted filament.
Environmental Conditions That Impact Printing
Temperature and humidity affect your entire print. A cold room slows cooling, which can cause stringing. A hot room speeds cooling unevenly, causing warping. High humidity introduces moisture into your filament even while printing.
Ideal conditions:
- Room temperature between 68-75°F
- Humidity below 50%
- No direct drafts or fans blowing on your printer
- Stable power (voltage fluctuations can affect heater performance)
Frequently Asked Questions
Why do my 3D prints fail so frequently?
Print failures usually stem from multiple factors working together: poor bed leveling, filament quality issues, incorrect nozzle temperature, inadequate first layer adhesion, and moisture in your filament. Most frequent failures trace back to bed leveling or filament moisture absorption. Start by checking these two basics, then move through extrusion calibration and nozzle temperature adjustments. Quality filament like Silk PLA from trusted suppliers reduces failure rates significantly compared to budget alternatives with inconsistent diameter.
How does filament quality affect print success?
Poor filament quality causes under-extrusion, diameter inconsistencies, and brittleness, all leading to failed prints. Budget filament often has moisture trapped inside, inconsistent diameter tolerances, and inferior material composition. Premium filament maintains consistent diameter within tight tolerances, resists moisture absorption better, and extrudes predictably. This consistency means your calibration stays accurate across prints, reducing failed attempts and wasted material.
What is the most common cause of first-layer adhesion failure?
Incorrect bed leveling is the leading cause of first-layer adhesion problems. If your nozzle is too high, plastic won't stick; too low, and the nozzle clogs. Even slight misalignment across the bed creates weak adhesion in some areas. Check bed leveling before every print session using the paper-thickness method. Also verify your build plate is clean and consider an adhesion promoter for stubborn materials.
How can I prevent nozzle clogs and heat creep?
Maintain proper nozzle temperature for your filament type, use consistent print speeds (slower speeds reduce heat creep), and ensure your cooling fan works correctly. Clean your nozzle regularly with a brass brush while heated. Store filament properly in dry conditions to prevent moisture-induced clogs. If clogs persist, check that your hotend cooling fan is functioning and that your print speed isn't too fast for your filament diameter.